How to set up Product Analysis Categorisation
Learn how to effectively organise your products into categories for easy navigation and improved user experience on your website.

Written by Ryan Osborne
Updated at May 30th, 2025
Table of Contents
Product Categorisation – Categories, Groups and Subgroups
What is Product Categorisation?
Product categorisation refers to the process of organising and classifying products or items within Merchenter based on various attributes or criteria. This categorisation allows for efficient management, analysis, and reporting of products across the organisation.
Key Aspects of Product Categorisation within Merchenter
Why is it useful to categorise products in Merchanter?
Hierarchical Structure: Products are organised into a hierarchical structure, consisting of:
- Categories (CAT)
- Groups (GRP)
- Subgroups (SUB)
This structure helps users navigate and locate products easily.
Attributes and Attributes Sets: Products may be categorised based on attributes such as type, size, species, material, brand, supplier or any other relevant characteristic.
Sales and Marketing: Categorisation assists in targeted sales and marketing efforts by grouping products with similar characteristics.
Pricing and Pricing Structures: Product Categorisation can influence pricing strategies, with different pricing structures applied to various product categories, groups, and subgroups.
Reporting and Analysis: Categorisation supports reporting and analysis functions by providing a structured framework for analysing sales performance, inventory turnover, profitability by product category, and other key metrics.
Overall, product categorisation within Merchenter enhances organisational efficiency, decision-making, and competitiveness by providing a systematic approach to managing and analysing product-related data and activities.
How to Create Product Categories in Merchanter
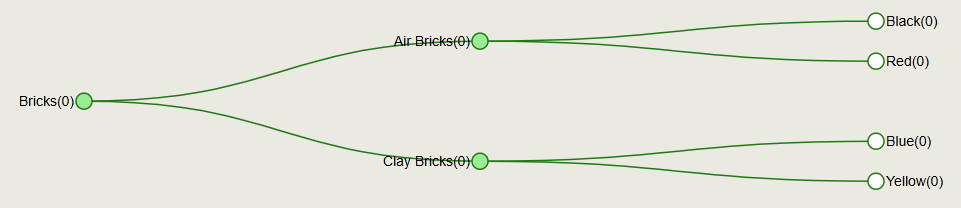
In this guide, we will walk you through the steps to create product categories, groups, and sub-groups in Merchanter. In this example, we will create a category, 2 groups, and 2 sub-groups of each group.
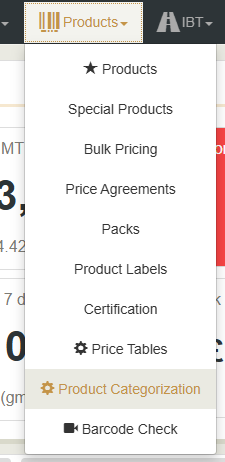
Step 1: Access Product Categorisation

Select Product Categorisation from the options.
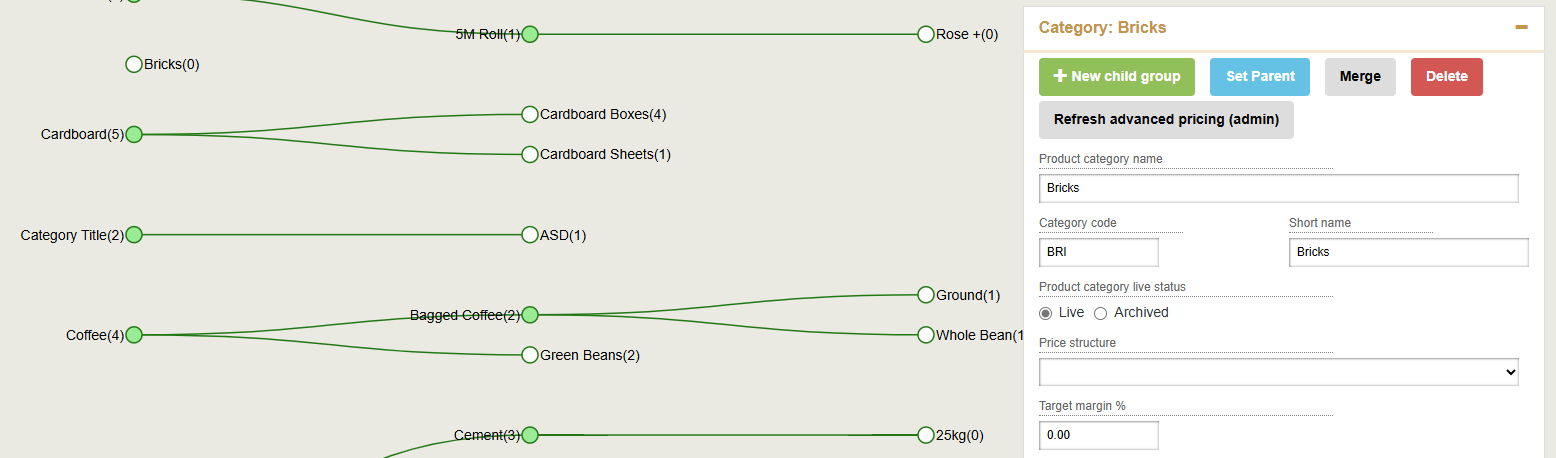
Step 2: Create a New Category

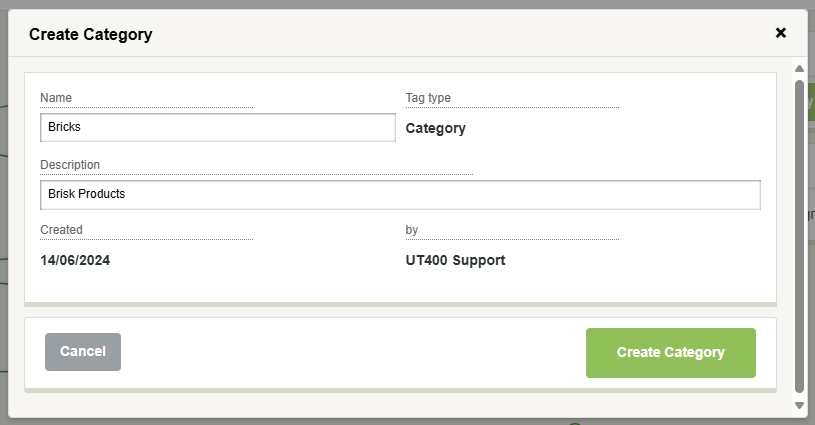
For this example, we will create a category for Bricks.
Give the Category a Name and a Description and then press the Create Category button
Special Characters
Please note do not use / or \ in the name of the catagory, group or subgroup. It will stop the catagory from appearing in the filters and lists.
Step 3: Add Groups to the Category
In the new window on the right-hand side of the screen click the New Child Group button.
a similar pop-up for groups now opens

Create a group for Air Bricks.
Again you can add a Name and Description.
Once you are finished click Create Group.
Repeat the process to create a group for Clay Bricks.
Step 4: Add Subgroups to the Groups

Create a subgroup for Red Air Bricks.


Step 5: Assign Products to Categories
There are several methods to assign products to categories in Merchanter:
Method 1: Using the Uncategorised Products Tab
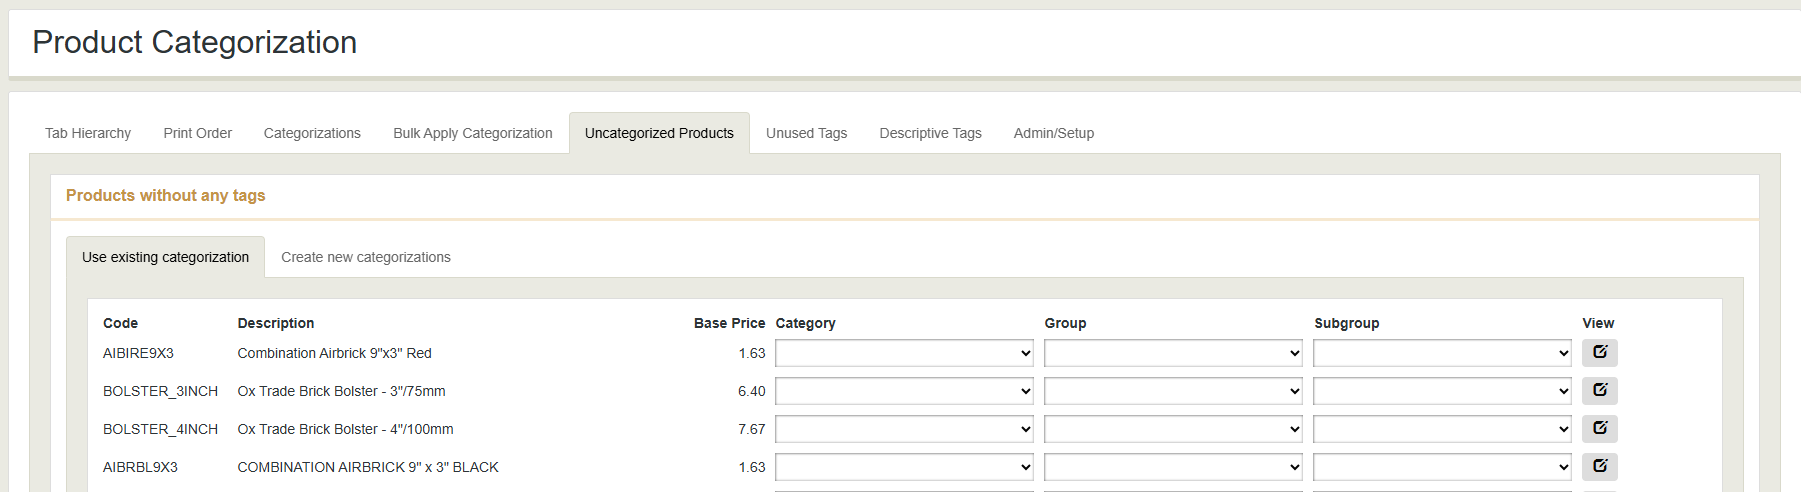
Find the product you want to categorise and choose the appropriate Category, Group, and Subgroup. from the drop-down menus. These selections auto-save.

Click the Refresh button at the bottom of the table to clear the list after setting the Categories.
Method 2: Editing Individual Products
Navigate to the product you want to change. Edit the desired product.

Scroll down to the Categorisation section.
Select the correct category structure from the drop-down menus for your product..

Click Save.
Method 3: Bulk Apply Categorisation
Go back to Product Categorisation.
Select the Bulk Apply Categorisation screen.

Use the search and filter options to find the products.
In this Example, i searched for "brick".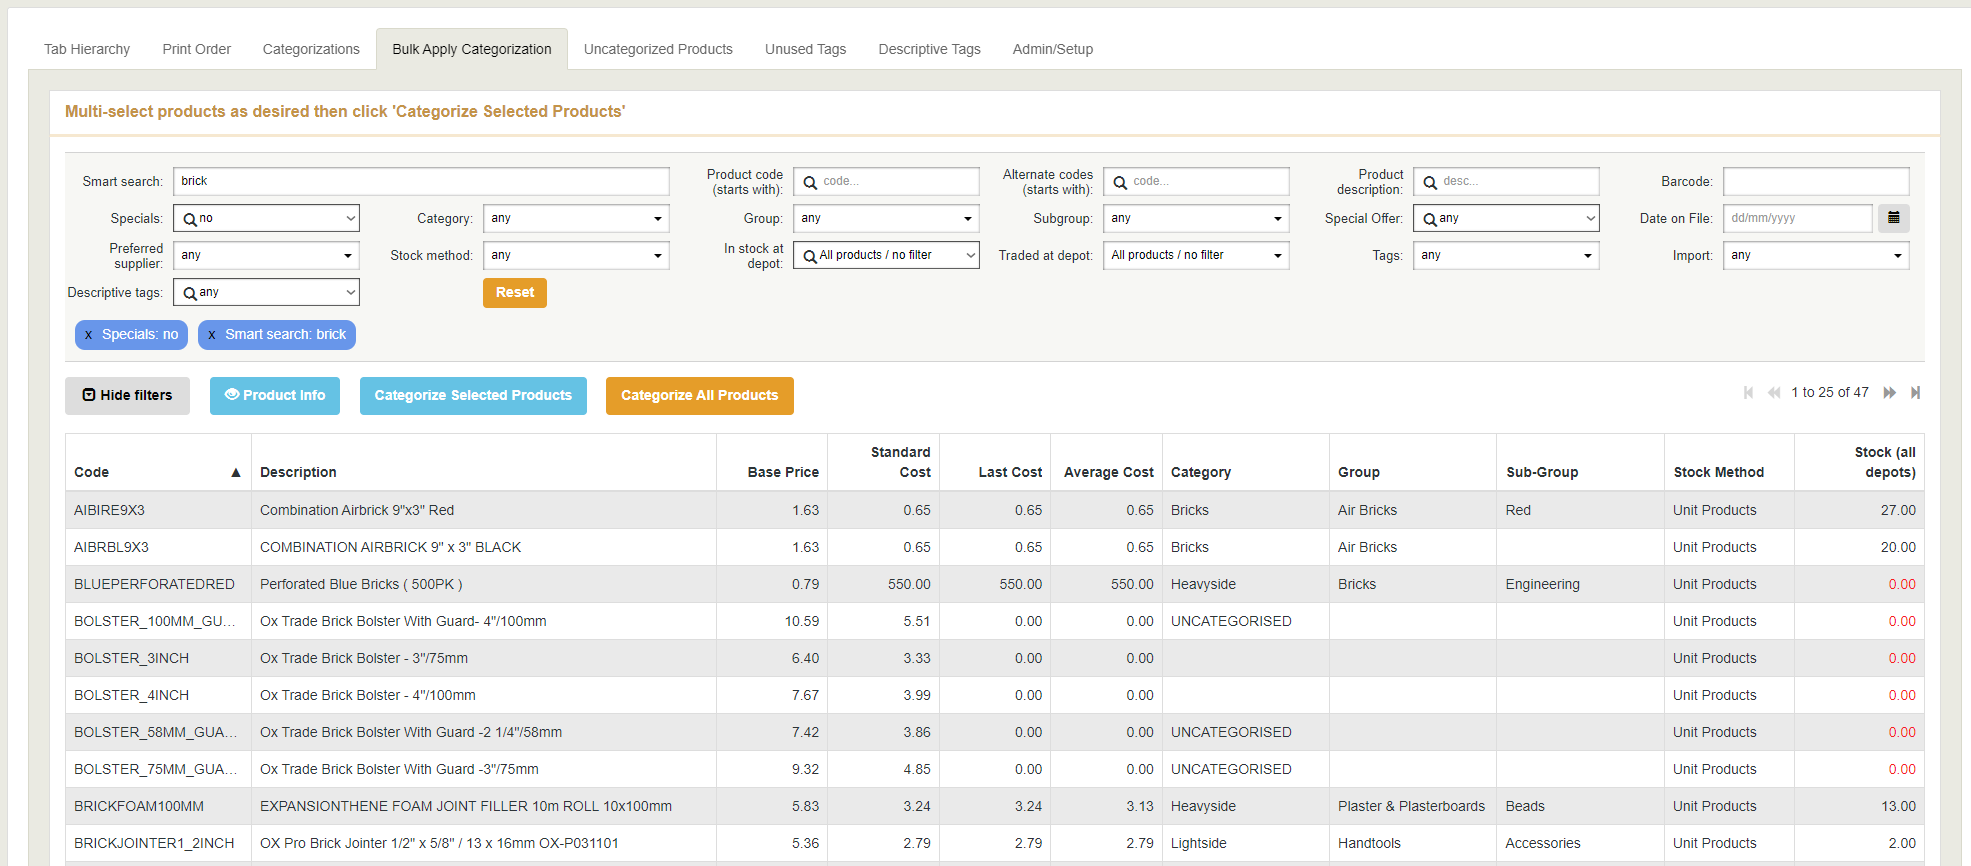
You can now multi-select the products you want to categorise.
Then click the Categorise Selected Products button.
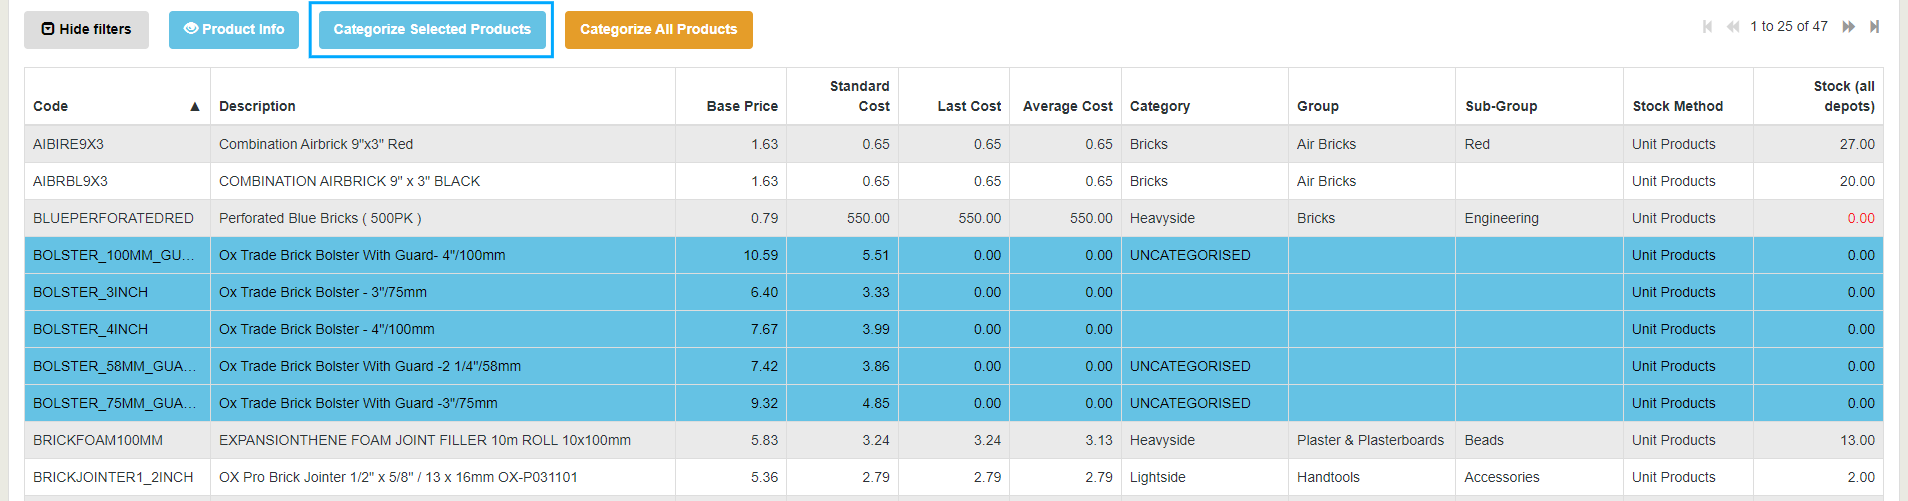
You can now set multiple categories at once.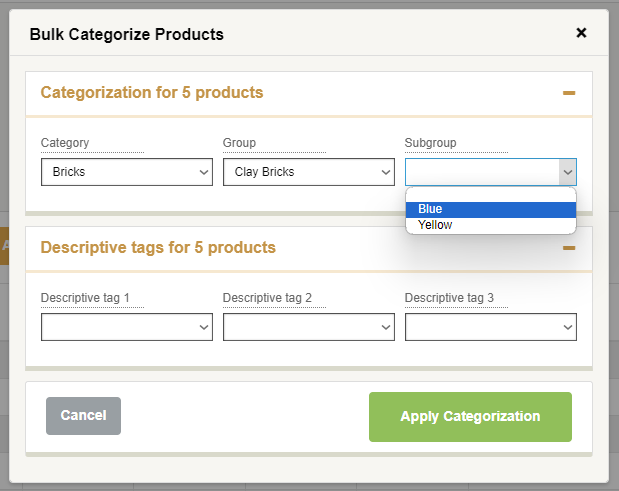
Make sure you have the correct selection, all products selected will be changed, once you click the Apply Categorisation button.
How to Edit a Category, Group or Sub-Group.
Step 1: Access the Product Categorisation Menu.
Navigate to the product categorisation menu.
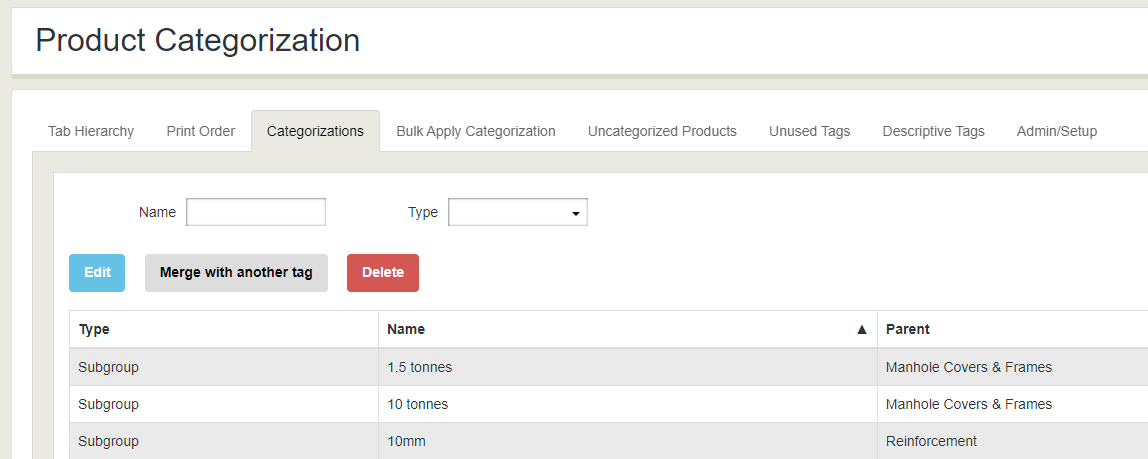
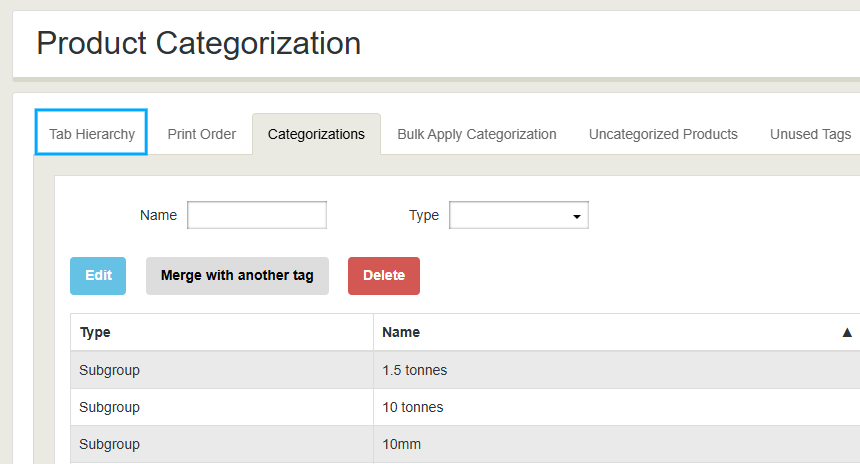
Step 2: Search for the Category, Group, or Subgroup.
Use the search bar on the categorisation screen to find the specific category, group, or subgroup by name.
Utilize the type filter to narrow down your search by category, group, or subgroup.

Step 3: Select and Edit the Group.
For example, if searching by the group "brick," several different groups will appear. Double-click on the desired group to edit its records. there is also a blue Edit button you could click after selecting your record.
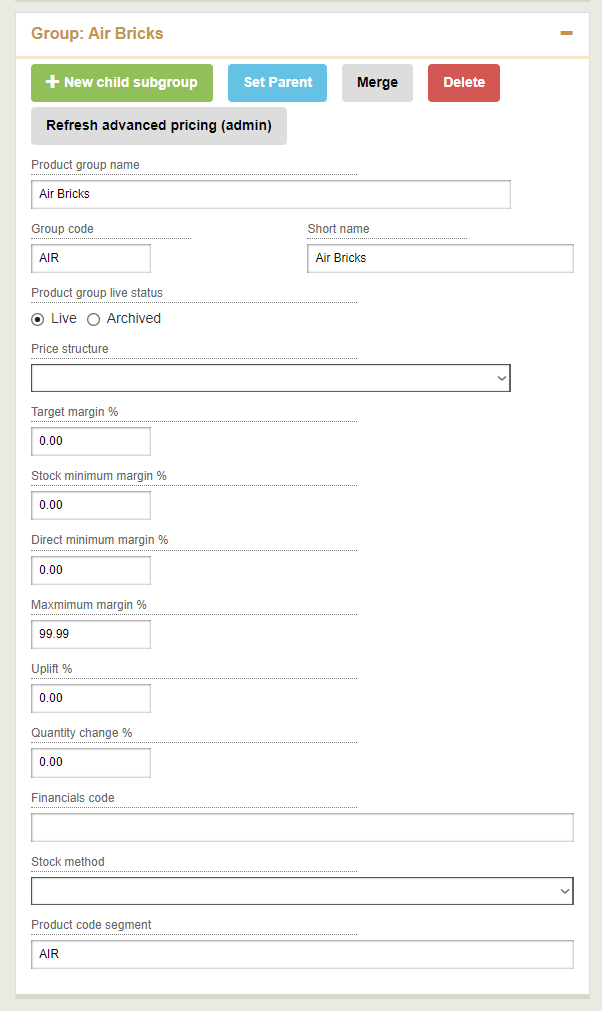
Step 4: Make Edits to the Group.

- You can make changes to the name, tag colour and type of the record
- Move it to a different parent category
- Amend the description, short description, and segment code
- Check if any products are tagged with this group tag
- Edit the record as you see fit and then press the Save button.
Step 5: Alternative Editing Method via Tab Hierarchy.
Go to the tab hierarchy and locate the item you wish to edit. Click on the item, and the details will appear on the right-hand side of the screen.
in here you can:
- Edit the name, short name, group
- Archive the item if it is no longer needed
- Set margin percentages for the category if applicable
- This window will auto save your changes.
Conclusion
By following these steps, you can efficiently organise and categorise your products in Merchanter, allowing for better management, analysis, and reporting. If you have a large number of products, the bulk categorisation feature can save you significant time when configuring your products.