Web Shop Integration (WooCommerce)
Table of Contents
Woo Commerce Integration Guide
WooCommerce is an ecommerce plugin for WordPress. It makes creating and managing an online store simple, with reasonable levels of flexibility and several vital features such as inventory and tax management, secure payments, and shipping integration.
How integration works on Merchanter
- Merchanter will act as the master system and all product, customer and stock changes should only be done on Merchanter.
- WooCommerce customers will be auto mapped to Merchanter customers if the email address matches the sales contact email address in Merchanter
- Customers where the email address does not match a sales contact in Merchanter are unmapped for subsequent manual mapping.
- WooCommerce products will be auto mapped to Merchanter products if either the SKU matches the product code in Merchanter or the name matches the product description in Merchanter, otherwise left unmapped for subsequent manual mapping.
Information Required for Configuration
- Website URL
- The Consumer Key and Consumer Secret
- Admin access to Woo Commerce account
- Payment Methods and Codes
Setup New Product (Web VAT adjustment)
Create a new product on Merchanter and use the below details.
Product details

Stock Control

Price Structure

Pricing

Costs

Setup New Customer (Web Cash Sales)
Create a new cash only customer on Merchanter as ‘Web Cash Sales’. Use ‘CASHWEB’ as customer code, and for address use ‘Web Cash Sales’. No other changes are required for customer.
Setup New Cash Drawer (Web Payments)
Use ‘Web Payments’ as Cash drawer name and type ‘Payment Via Web Shop’ as description. No other changes are required for cash drawer.
Setup New Employee (WebShop Employee)
Go to Settings -> User administration -> Employees -> New and create a new employee called ‘WebShop Employee’.
Setup Defaults
To setup defaults go to Settings -> Organization Settings -> Financial Ledger Settings , highlight the ledger and click Edit. Click on Defaults tab and use the below settings.
Setup Scheduled Jobs
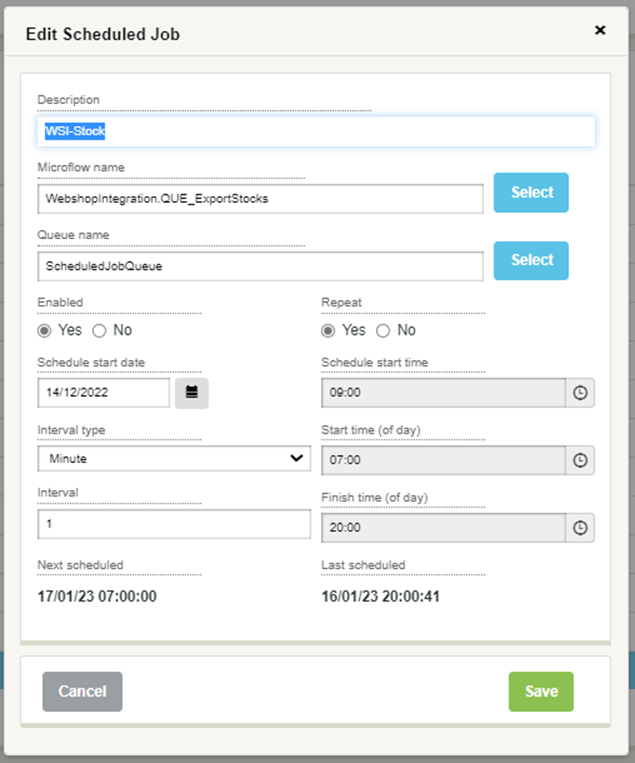
To setup scheduled jobs go to Settings -> System Administration -> Scheduled Jobs and create the following 3 jobs.
- WSI-Products

- WSI-SalesOrders

- WSI-Stock

Web shop Link Configuration
Once you have gathered all the information, you can start configuring the Webshop Integration on Merchanter.
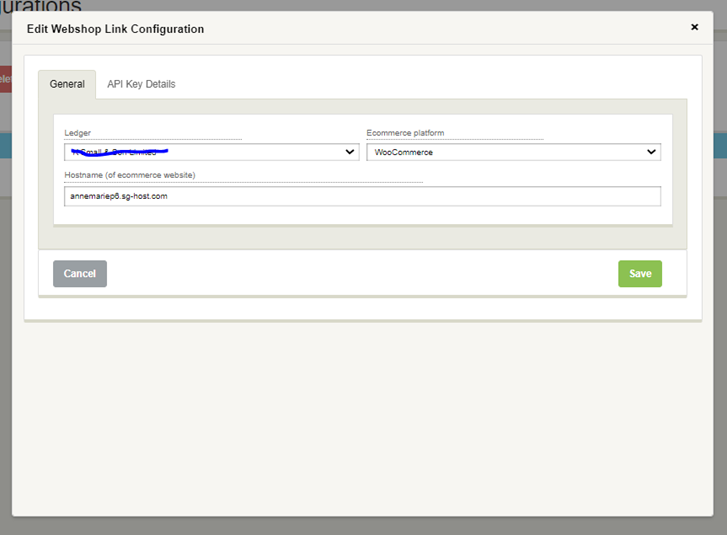
Go to Settings -> Webshop Integration -> Link Configuration ,select New and fill in the details.
Info - Adding hostname URL
In Hostname enter the website URL without the https://
Next select the API Key Details tab and enter the Consumer Key & Secret provided by the customer.
Select Save once done.
Entity Mapping for existing web shops
You only need to do this if the customer has a pre-existing Web shop with Products on it. You can use this to Map the Customers and Products. Go on to the required tab and select Automap. If the products which are on website don’t exist on Merchanter they will be left under unmapped which you can later Map manually.
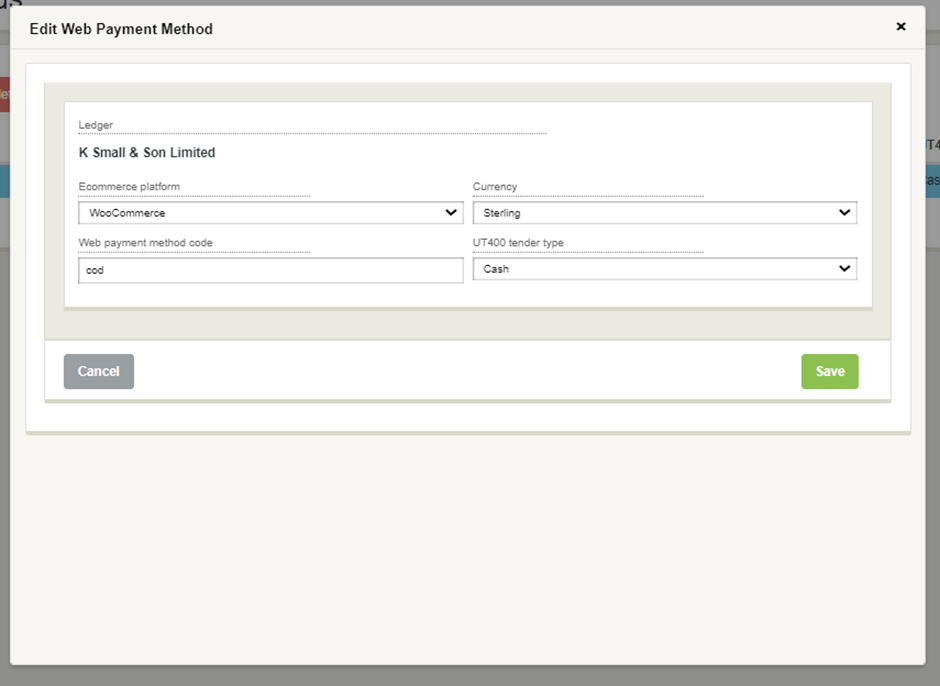
Web Payment Methods
Next step is to link the payments from Website to Merchanter. Create each payment method and link it to the correct tender type.

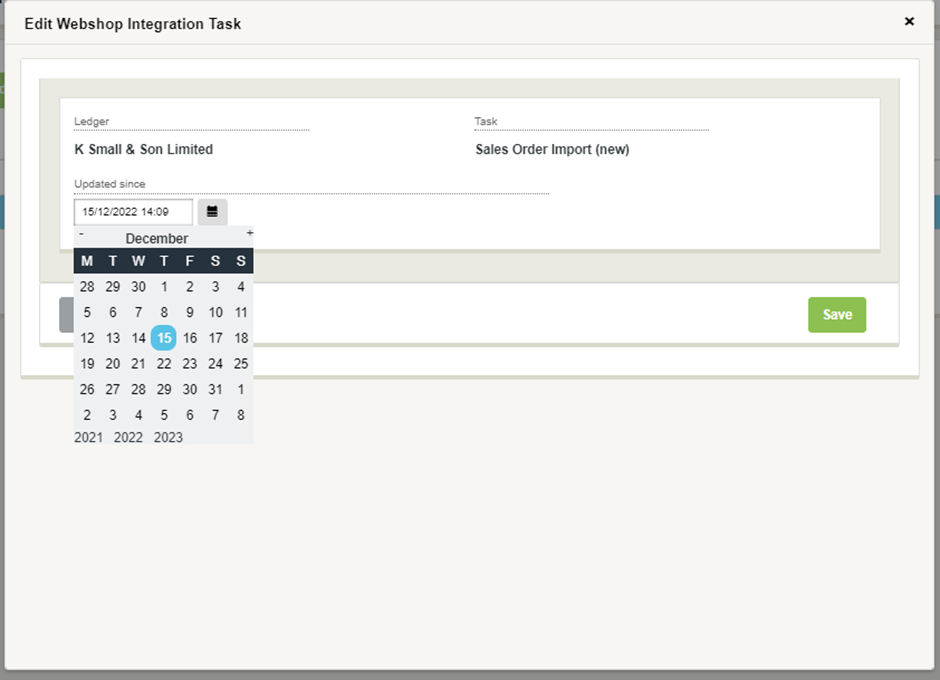
Integration Tasks
Highlight the Sales Order Import task and click edit, If the task doesn’t exist then create a new one. From the Updated since section select the time and date from when you would like the Sales Order Import to start from, it will ignore all orders prior to the date and time selected.

Success
You should now have fully working Web Shop integration.