How to Turn on Purchase Invoice Integration (Xero)
Learn how to enable Purchase Invoice Integration in your Xero financials, to streamline the purchasing process.

Written by Omer Khaled
Updated at September 15th, 2023
Table of Contents
Step 1 - Enable Purchase Ledger integration
Go to Settings -> Organization Settings -> Financial Ledger Settings. Double click on the Financial Ledger and select the Accounts Integration Tab. Turn ‘Purchase Ledger Integration enabled’ to Yes.

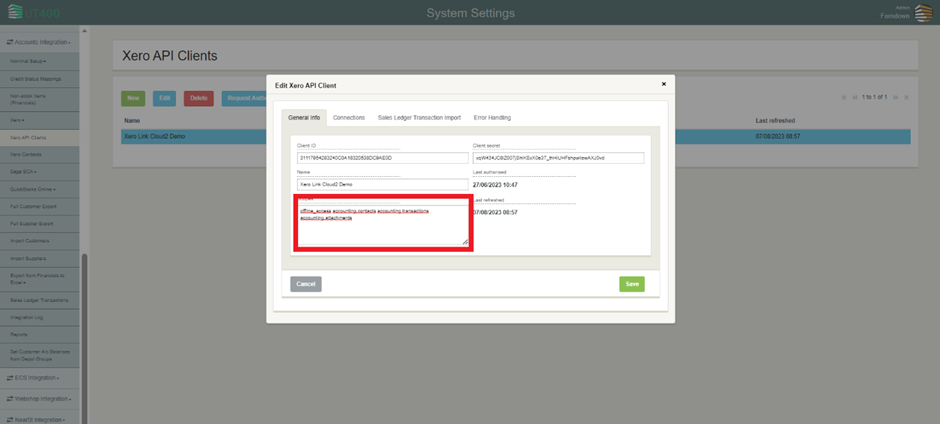
Step 2 - Update Xero API Client
Go to Settings -> Accounts Integration -> Xero API Clients. Double click on the client’s name and add ‘accounting.attachments’ in scopes. The scopes should look like this ‘offline_access accounting.contacts accounting.transactions accounting.attachments’. Save and re-authorize Xero for the changes to take effect.
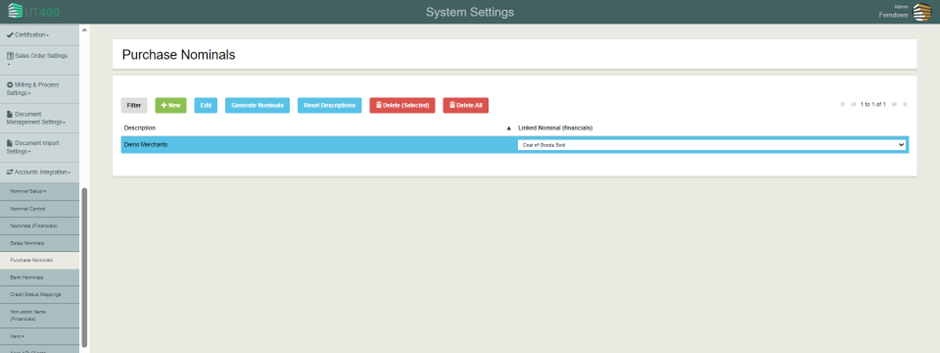
Step 3 - Generate Purchase Nominals
Go to Settings -> Accounts Integration -> Purchase Nominals. Click Generate Nominals to generate purchase nominals from Xero and link this to the correct nominal on Xero.